Or in other words, how to cut out images. There are two ways to go about cutting images. The first is to use the magic wand or the magnetic lasso tool. I personally wouldn't recommend the use of the magic wand tool, but that's because I don't prefer it. Everyone has their own preferences, I guess. NOTE: Most images can be clicked on to be enlarged.
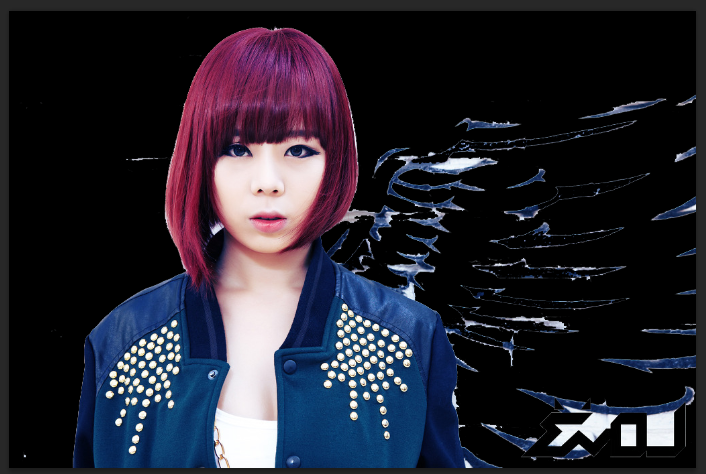
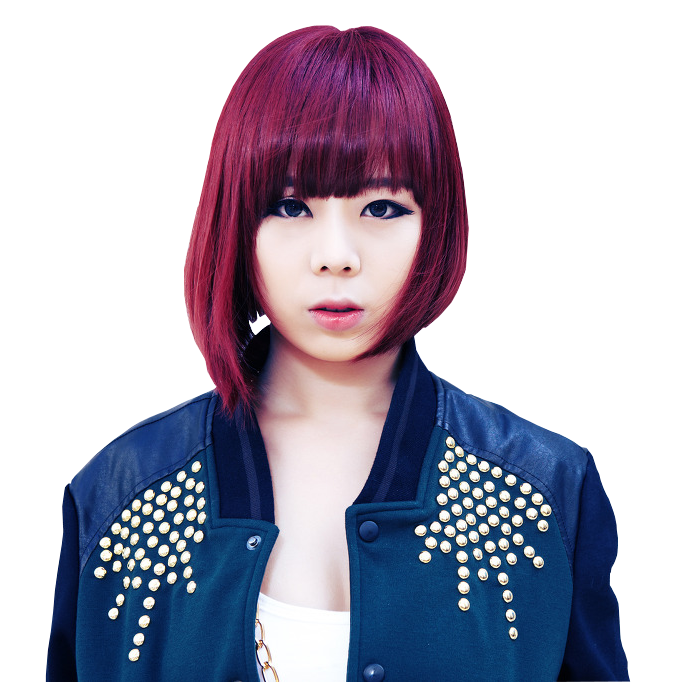
This is the image I'll be cutting out today. JUCY's concept picture from Second Evolution. The first thing you should know about cutting out images is that there should have a stark contrast between the person or object you want to cut out in comparison to its background. With this picture of JUCY, notice that she stands out from the near white background, which will make her easier to cut out.

In this picture of T-ARA's Eunjung, I wouldn't decide on cutting it out for the following obvious reasons: firstly, background colour and the colour of Eunjung's hair and clothes are very similar. There's no clear line to follow and you'll have to do a lot of guessing. Secondly is because of Eunjung's shoulder in the foreground. You won't get a nice, clean cut of Eunjung's reflection like that. Another picture I wouldn't use is this one of Infinite's Myungsoo. The reason why I would choose this as an image that I wouldn't cut out is because firstly the picture quality and because of his slightly blurred right shoulder, but secondly, you also can't get a nice, clean upper body cut of him with the person's arm in the lower right corner. The last reason why I wouldn't cut this is because it's edited. A rule we should all stick with is to avoid editing already edited images, though I have to admit, it does make a good image to blend.
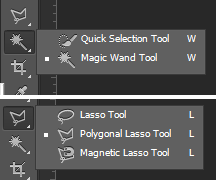
Anyway, I'll start with the magic wand tool. The first thing you want to do is select the fourth icon on the toolbar to your left (or wherever you may have moved it to) and make sure it has this icon:

If that icon isn't there, right click on it to bring up the options menu and select the 'magic wand tool'. While you're at it, you might want to change the lasso tool to the 'magnetic lasso tool', which is the tool we'll be using in the second half of this tutorial.
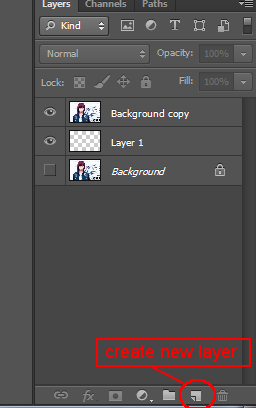
The second thing you want to do is to create a copy of the image you want to cut out (ctrl + j for Windows users. For Mac users, it's cmd + j), it's , and then create a transparent layer underneath your duplicate.
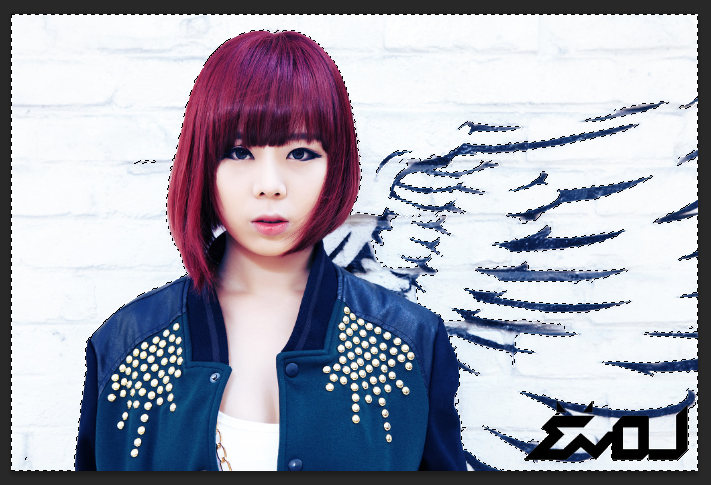
Using the magic wand tool, I select the background (the white bricks behind JUCY) which gives me an outline like this. Notice that the selection has pretty much selected everything around JUCY and the wing pattern on the background.
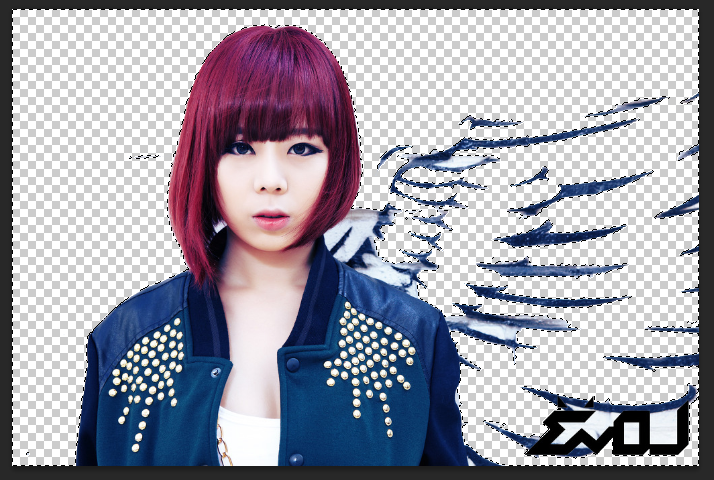
Then hit the delete button on your keyboard. This is what your image should look like:
Deselect the selection by pressing ctrl + d (or cmd + d in Macs). All you have to do now is work on removing the wing pattern in the background by either using the eraser or by using the magic lasso tool. I wouldn't use the magic wand tool to remove the wings, because the magic wand tool will usually tend to remove only the colour within the pattern, not the outline.
Though the magic wand tool is easy to use, it's not always the best option to use. Sometimes you still have to go back and cut the image using the magnetic lasso tool to create a nice cut, which means you probably could have done a better job using the magnetic lasso tool from the very beginning. Here's why:
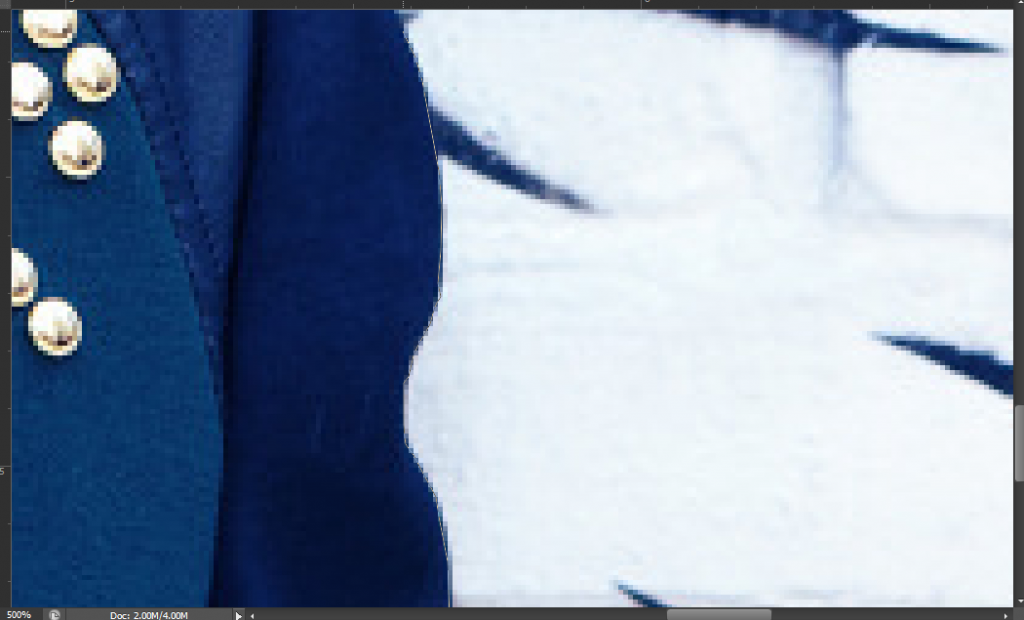
By making a new layer and filling that in with black, you can see that there's still a bit of a white outline around JUCY and my attempt of removing the wings behind her using the magic wand tool. Here's where I'll teach you to use the magnetic lasso tool.

The first thing to do is to select the magntic lasso tool in your toolbar. Then you want to zoom in on the picture and select a starting point. I say the closer the better, so I've zoomed in 500% into JUCY's picture. The trick is to zoom in close enough to still be able to see an outline, but not to zoom in so close that you can tell each pixel apart. Then all you want to do is follow her outline like so:
The best part about using the magnetic lasso tool in Photoshop is that just by moving your mouse, the image will follow, so you won't be inconvenienced by having to constantly scroll around. I'm a GIMP user before I'm a Photoshop user and in saying this, I can say that I prefer cutting out images in GIMP compared to Photoshop. The reason is that you cannot go back and edit your selection in Photoshop like you can in GIMP.
Anywho, once you've made an outline around your object and have reached the 'end' of the picture or have reached the point where you started, double click to create a selection. The result should be something like this:
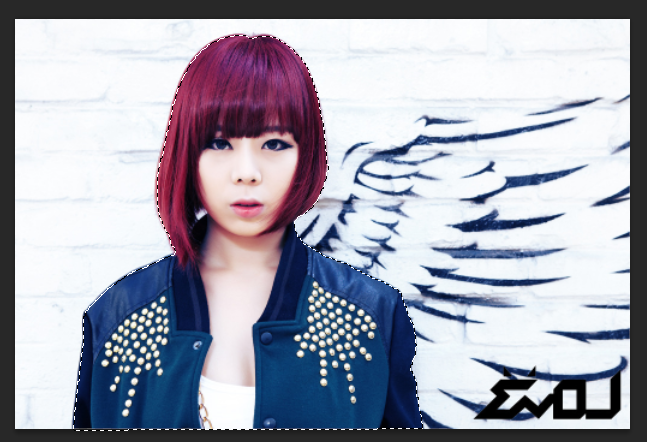
What I usually do next is to invert the selection (ctrl + shift + i or cmd + shift + i) so that everything other than JUCY is selected, like so:

Then hit your delete key and voila!
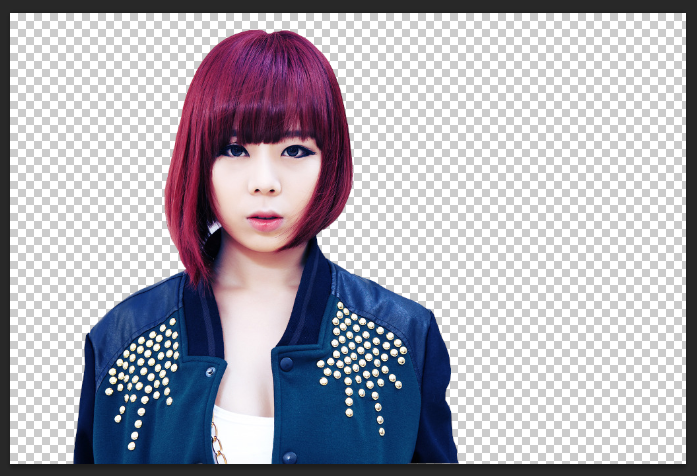
From here on, you can bring up a black background behind JUCY and continue to edit your PNG, for example, if you have a little white line on her shoulder and want to remove it, you can see it and remove it. When you're finally happy with the result, you can resize the canvas for your PNG like so:

Here I've resized it to a 700x682px canvas. You should resize in small numbers like 100px at a time to avoid accidentally making your canvas size too small. Then go to file > save as and then change the format to PNG..

And there you have it!
Good luck, have fun and remember, practice makes perfect!Labels: Tutorial, Type: Online

Post a Comment